

One of the best things about the Showit platform is that it integrates with WordPress. That means you can create your website design inside the Showit builder but do all your blogging in WordPress.
This is a great feature if you are familiar with WordPress but have been wanting a website theme that gives you more creative freedom, because you can have the best of both worlds!
No other website platform I know of offers this unique capability, but that’s also why it might take a little getting used to when you create your first Showit website.
Understanding Your Showit Blog Templates
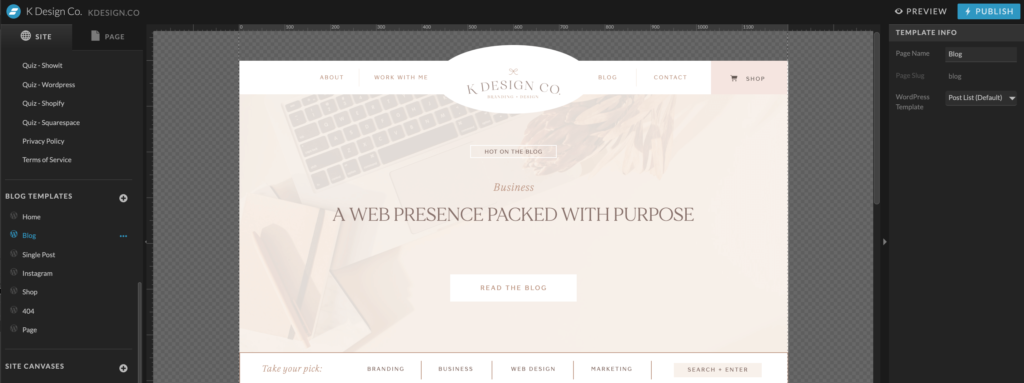
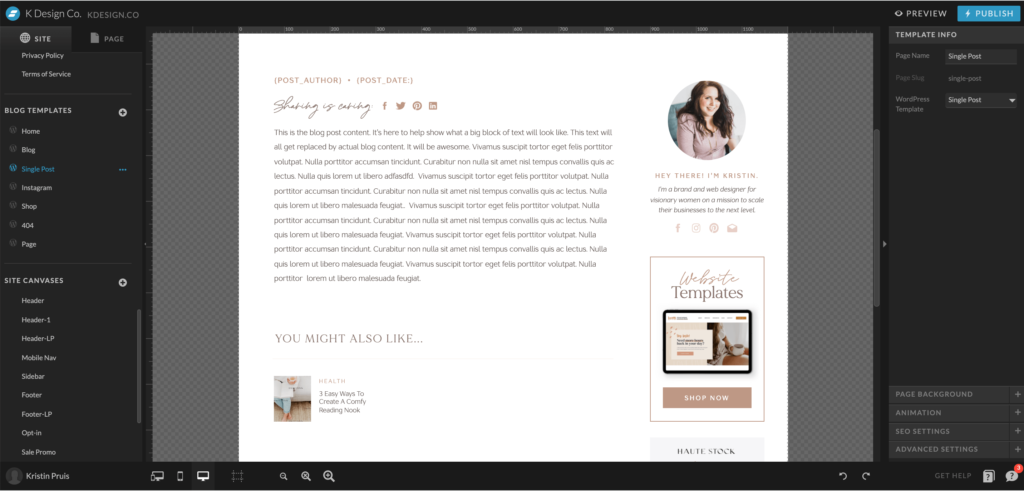
When you first take a look inside the Showit builder you’ll notice there are two different page sections on the left navigation. One section is called Pages and the other is Blog templates.
Pages is where all your regular website pages are located, such as About, Services and Contact. These are considered static designs because exactly what you design in Showit is what you will see on your live site.
Blog Templates is where your blog templates live, such as your blog feed and single post design. These are considered dynamic site pages because of how they will merge with WordPress to display your blog content, meaning the design will change depending on the content you create in WordPress.
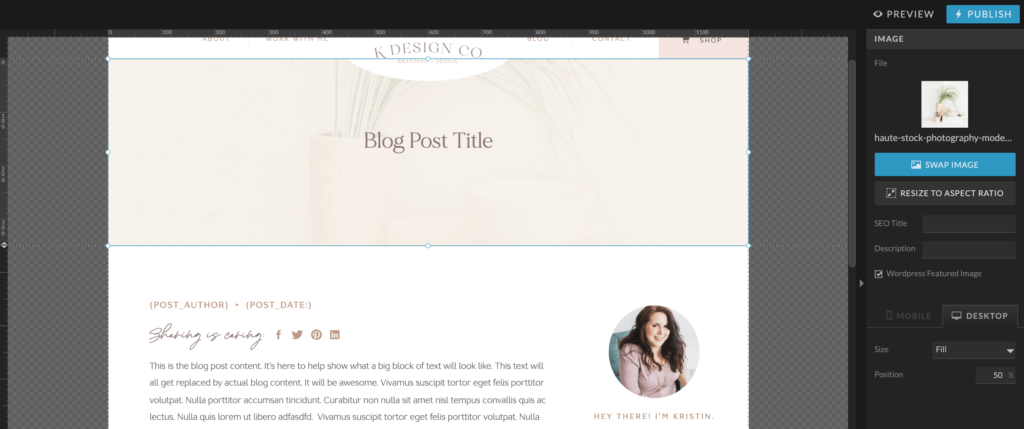
Your blog templates in Showit will use placeholders that will be overridden by WordPress once you publish your site. That’s why you don’t need to worry about the replacing the text or images displayed inside of Showit for your blog since they are merely stand-ins for your actual content that will soon appear.
Note that you won’t be able to view your blog content in Showit, but rest assured, it will display on your live site as long as you have the right settings in place and you have published posts that you’ve created in WordPress.
Showit Blog WordPress Placeholders & Settings
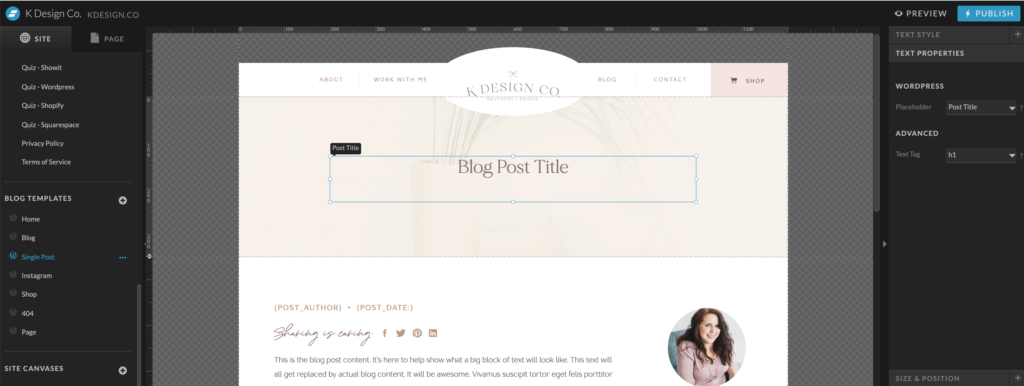
Showit uses text and image property tags on your Single Post template that will help you assign how the placeholders in your template design will be overridden. For example, if you place an image box on your Single Post template, but want that to be where your blog’s featured image will display, simply check the box on the image tab that says WordPress Featured image.
WordPress text properties can be added to any text box that is placed on a blog template page. Other WordPress placeholders that you can assign for your blog template inside of Showit on your text boxes include:
- Post Title
- Post Excerpt
- Post Author
- Post Content
- Tags
- Categories
- Top Category
- Date
- Next Post
- Previous Post
The good news is, if you’ve purchased a Showit template from the Showit store or my showit template shop , your blog settings are already mostly configured for you. However, it’s important to understand the basics of how your Showit blog works so that you don’t mess up any critical settings that make your blog function.
This will ensure that your new posts in WordPress can seamlessly merge with your Showit design. Understanding your Showit blog template settings can also allow you to further customize your design if you want, beyond what was originally created in your template or take a design you’ve created from scratch to the next level.
For example, you might want to remove the date from your blog posts, embed a sign-up form, change the featured image sizing, add a comment section, add related posts, or create a featured posts section on your blog feed that only pull blogs from a certain category. All of these changes would be done directly inside of Showit on your Single Post template, not in WordPress, since it affects your blog template design.
Showit Blog Customization
Out of the box, your Showit blog template will inherit the Design Settings from your template for your headings and paragraph font styles and should work well without any additional customization.
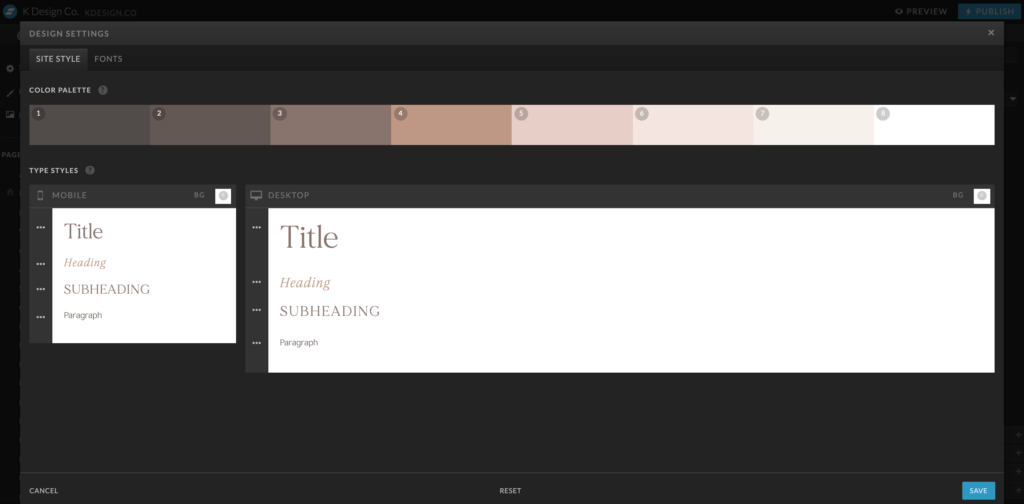
However, you may want to adjust your blog font styles to be slightly different for the rest of your site. For example, I like my paragraph text to be a slightly larger font size than my paragraph text on my static pages since a blog has long form content and a larger text is easier to read.
Also, you may notice that WordPress offers additional heading levels that aren’t available in Showit’s Design Settings by default: H4-H6. These headings aren’t typically used as frequently for blogging and you can certainly get by without them, but if you like the added visual structure it can give to your blog, you may want to create additional font styles for them. Hopefully, some day soon, Showit will add this capability but for now, you can achieve this with some basic CSS code.
CSS Code Customizations
Some examples of the customizations you can make to personalize your Showit blog design are picking a different font for headings, increase the font size, change your link styles, change the capitalization of text, customize block quotes, making text bold or italic, adding letter spacing and more. With CSS, really there are limitless combinations of settings and styles you can personalize, but here are a few you might want to try below.
Simply customize these codes to fit your preference and brand and then add them to your single post (or blog feed) template in Showit under the Advanced Settings tab and the changes should apply once published:
Change the paragraph font size:
.d .st-d-paragraph, .m .st-d-paragraph{
font-size: 16px;
}
Add spacing between the letters and make uppercase on H4:
.d .se-wpt h4, m .se-wpt h4{
letter-spacing: 1px;
text-transform: uppercase;
}
Remove underline from links and add a background color:
.se-wpt-pc a{
text-decoration: none;
background-color: #efefef;
padding: 2px 5px;
}
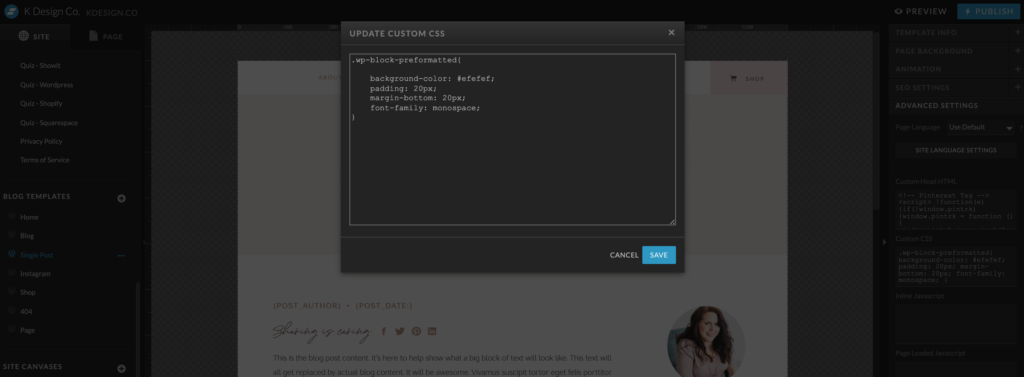
Add styles to your block quote:
.se-wpt blockquote{
display: block;
background color: #efefef;
padding: 20px;
margin-bottom: 20px;
font-style: italic;
}
Change your H5 heading font:
.d .se-wpt h5, m .se-wpt h5{
font-family: Arial, sans-serif;
}
As mentioned, you might be happy with your Showit blog styles already and may not need or want to use CSS at all. These are just examples of ways you can customize your blog with CSS if you are looking for more control over how your blog text is formatted. Just make sure to adjust any color codes, font names or other styles to fit your preference if you copy and paste these codes.
Writing Your Blog Posts in WordPress
Once you’ve made your adjustments to your blog template or single post template, it’s time to write your blog posts in WordPress!
*I repeat – DON’T write your blog content in Showit! Do it in WordPress!*
Login to your WordPress dashboard and click on Posts and select ‘Add New’ to get started with writing your blog post. Add your title, content, featured image and then hit the big blue Publish button. You may also want to add a specific category or tag to your post or preview your post to be sure it looks as expected before you make it live.
Once you’ve published your post, Showit will do all the magic of populating the placeholders you defined on your Single Post template and Blog Feed template with all the correct content.
So now you’ve got your Showit blog setup… but what about SEO?
Well I’m glad you asked friend! Showit makes getting more organic traffic to your site pretty easy, but you’ve got to know the in’s and out’s of how it all works. I’ve built my website traffic up to 5-monthly figures and I break all the technical know-how down in this post: SEO with Showit that you’ll definitely want to read.
And if blogging, SEO or personalizing your Showit blog feels a little out of your comfort zone, I’d love to help.
I offer full and half VIP days to help with any odds and ends you want taken care of on your Showit website or blog. Reach out to me here to set up a free info call.